Wednesday, December 2, 2015

How to Keep Printer Ink From Drying Out

If you have printers in your office that you seldom use, you run the risk of the printer ink drying out. When you attempt to use these old cartridges to print your business documents, the output will be unclear and barely readable. Fortunately, you can take several steps to keep your printer ink from becoming unusable.

Keep Cartridges Active

One simple way to prevent printer ink from drying out is to use the ink cartridges. Make a point of printing at least several pages a week, even if you simply print a test page and then discard it. Additionally, make sure the documents that you print utilize all of the colors in your ink cartridges. This will ensure that seldom-used colors won’t dry out and render the cartridges unusable, creating headaches when you are in a rush to print important documents.

Moisten Cartridges

Regular moistening can extend the life of your printer cartridges, particularly if they don't get a lot of use. Put on protective gloves and remove the cartridges from the printer. Gently wipe the top of each cartridge with a clean, damp cloth or paper towel to remove residual ink from the surface. This helps to prevent the cartridges from becoming clogged, ensuring a continuous flow of ink during print jobs. Dry the moistened cartridges before reinserting them into your printer.

Adjust Temperature

Maintaining a moderate temperature in your office can go a long way to prevent printer cartridges from drying out. Ink dries out faster when exposed to excessive heat or cold, so try to maintain a comfortable 68 degrees in your office. Besides extending the life of your cartridges, this measure will create a more comfortable work environment for your employees.

Properly Storage

If you don't intend to use a printer for an extended time, you can preserve the ink cartridges by removing them from the printer and storing them separately. Put on gloves, remove the cartridges and securely wrap in a damp cloth or paper towel. Place the cartridges in a sandwich bag or airtight plastic container and store in an area that is not subject to extreme temperatures.
On printers where the print head is integral with the cartridge (most HP models for example), if you know you are not going to be using it for a while simply remove the cartridges, refit the protective covers and pop them into an airtight zip-lock bag until you need to use it.

Sunday, November 22, 2015

How To Reformat An SD Card To Use It Normally Again

WINDOWS
Start a command prompt, and start the DISKPART console. List all of your disks by typing LIST DISK, then select the proper disk with SELECT DISK # (where # is the SD card). You can then type CLEAN to clear the partition table on the card, effectively blanking it. MAKE SURE YOU SELECTED THE PROPER DISK BEFORE RUNNING THE CLEAN COMMAND!
To create a primary partition to reuse the space on the card, type CREATE PARTITION PRIMARY. This will then reallocate the previously "cleaned" space.
To format, type FORMAT FS=FAT32 QUICK, and finally, to reassign a drive letter, type ASSIGN.
If you're unable to determine the proper disk, remove the SD card, run DISKPART and LIST DISK, and then re-run it with the SD card inserted. The SD card is just the disk that has been added.
Note that the above commands are not case sensitive; I used caps to match the convention DISKPART displays
LINUX / MAC
In a terminal, start fdisk /dev/sdx where /dev/sdx is your SD card device (may depend on the Linux distro you're using, see below). You can then delete all existing partitions on the device by typing d, and then adding a single new partition & format it. You an also just type n to create a new partition table, and start laying everything out.
cfdisk is also another viable tool, which is basically fdisk with a greatly improved user interface. In both cases, once the drive is formatted, you will lastly need to mount it.
If you're unable to determine the proper device, remove the SD card, run fdisk -l, and then re-run it with the SD card inserted. The SD card is just the device that has been added.

Thursday, October 8, 2015

Install Google Play Music Manager Beta on Ubuntu 14.04

Google Play Music Manager is a simple open source application used for adding the music files on your computer to your Google Play Music library, from which you can then listen to your songs on your mobile device or computer. With Google Play Music Manager, you can upload at least up to 20,000 songs, choose how much bandwidth you use to upload music, and download music you have uploaded or purchased on Google Play. You can also upload your iTunes, Windows Media, or any other collections of music you have to Google Play Music Manager.
googlemusicmgr-05
Install Google Play Music Manager Beta on Ubuntu 14.04 & Ubuntu 14.10
sudo sh -c 'echo "deb http://dl.google.com/linux/musicmanager/deb/ stable main" >> /etc/apt/sources.list.d/google-musicmanager.list'

wget -q -O - https://dl-ssl.google.com/linux/linux_signing_key.pub | sudo apt-key add -

sudo apt-get update

sudo apt-get install google-musicmanager-beta
– Start Google Play Music Manager
google-musicmanager

Remove Google Play Music Manager Beta
sudo apt-get remove google-musicmanager-beta

Wednesday, September 16, 2015

The Beginners Guide to Understanding Electricity Consumption

Electricity. We all need it. We all pay for it. Most of us would like to keep our electricity consumption (and our bills) to a minimum. But most of us also have no idea where to begin when it comes to calculating our own personal electricity expenses, or understanding how electricity consumption varies from appliance to appliance. To help you better understand your electricity consumption habits and expenses, we’ve put together a very basic guide to help you understand how your electricity bill is calculated.

Woman holding lightbulb
How is a unit of electricity measured?
The power of electricity is measured in watts (W). While watts are used to measure the power of an electrical appliance or product, the amount of energy converted in a one hour (h) period is known as kilowatt-hours (kWh). Therefore the units of electricity we purchase in store for our paid meters or on our electrical bill are equal to the kilowatts of electricity consumed per hour. So, one unit of the electricity that we purchase is equal to 1000 watt-hours (Wh) or one kilowatt hour (kWh).
By the numbers:
  • 1 unit of electricity bought = 1 kilowatt hour = 1000 watt-hours.
  • The wattage of something tells you how much electricity it consumes.
  • The higher the wattage of an item or appliance, the more electricity it uses in a standard period of time.

Watt watt

How much electricity will an item or appliance use?
An appliance will use its wattage worth of electricity in an hour (if left on, uninterrupted for an hour). For example, a 60 watt light bulb will use 60 watt hours of electricity in one hour. It will use 120 watt hours of electricity if left on for 2 hours, and more electricity as the time passes and it is left on to operate. The higher the wattage, the more electricity is required to run the item per hour.


How is the price of electricity determined?
In South Africa, the government has established an independent collective of experts who help to determine the prices we are charged by utilities such as electricity. This collective acts as a regulator and is known as the National Energy Regulator of South Africa (NERSA). It helps to determine the price of electricity by considering the cost to the supplier (as it should be if they run the company efficiently) and what a reasonable profit (rate of return) would be on the regulatory asset base.

The electricity costing program established by NERSA runs according to a semi-set Multi-Year Pricing Determination (MYPD). Currently NERSA operates on a five-year (macro-style) Multi-Year Pricing Determination plan (due to end in March 2018). This is so that the increase in the cost of electricity per year is slightly more predictable. The current price for 1 unit (1 kilowatt-hour) of electricity varies based on numerous factors, but hovers at around roughly R1.50 in domestic environments.

How much electricity does your home use?
To simplify things and help you make educated decisions about how you choose to use your electricity, we’ve compiled a guide to estimating how much electricity your home uses on average. See the appliances below found in a common household, along with their power ratings in Watts, and follow the instructions to calculating energy consumption: 
Appliance power rating (in Watts) X hours in use i.e. 40W x 2hrs = 80Wh or 0.08kWh.
The Beginners Guide to Understanding Electricity Consumption
Courtesy of Sustainable.co.za

Thursday, August 27, 2015

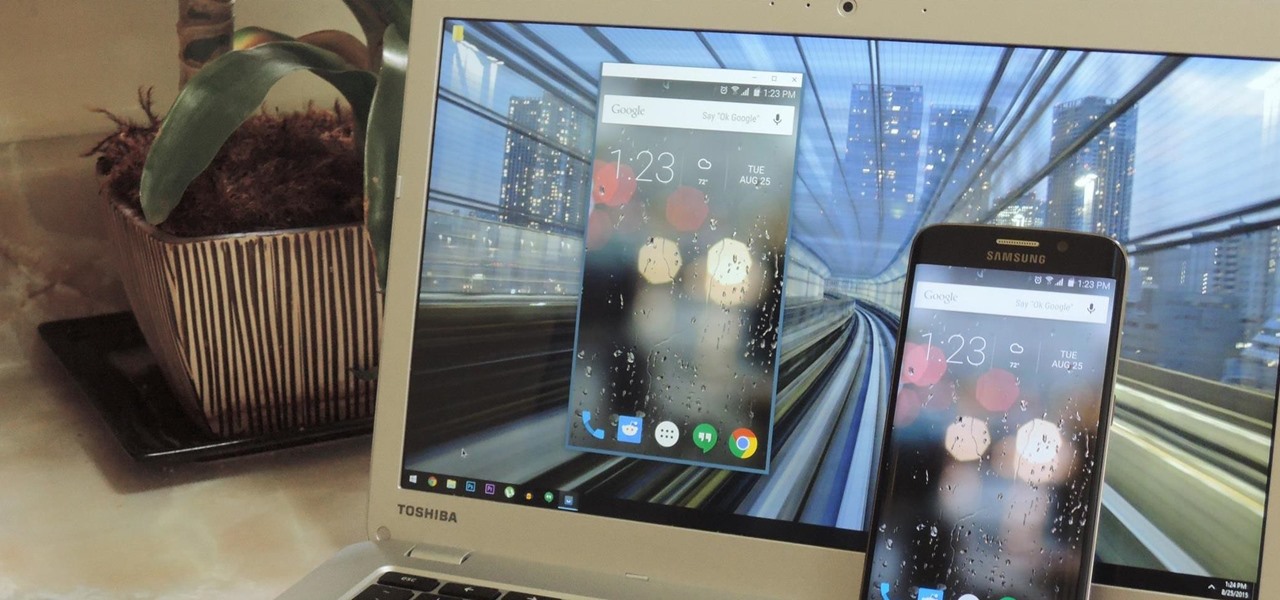
How to Fully Control Your Android Device from Any Computer

Monday, June 1, 2015

Set up Samba on Linux for Sonos

Sonos without Windows


I have a Linux server running Debian, a close relation of Ubuntu and a laptop running Ubuntu. I bought a Sonos ZP90 but not the controller. I found various bits and pieces on the internet on how to get this working but no complete howto so I thought it would be useful to others if I created a detailed guide for Google to find :-)

Physical set-up
The Sonos and server are connected to my ADSL modem with ethernet cables. The laptop connects via wireless.

Sharing the music
On the server create a new users sonos
Code:
sudo adduser sonos
sudo passwd sonos
and enter a new password.
Check that user sonos can read your music files
Code:
su - sonos
cd 
ls
cd 
ls
exit
check you have Samba installed
Code:
dpkg --get-selections | grep samba
If you have it returns
Code:
samba-common                                   install
If not install it with
Code:
sudo apt-get install samba
Back up the config
Code:
sudo mv /etc/samba/smb.conf /etc/samba/smb.conf.orig
then create /etc/samba/smb.conf to look like this
Code:
[global]
workgroup = server
netbios name = server
server string = Samba Server %v
load printers = no
log file = /var/log/samba/log.%m
max log size = 50
socket options = TCP_NODELAY SO_RCVBUF=8192 SO_SNDBUF=8192
interfaces = lo eth0
security = user
password level = 12
username level = 12
encrypt passwords = yes
username map = /etc/samba/smbusers

[musicshare]
path = 
valid users = sonos
read only = yes
printable = no
only guest = no
and create a samba users file /etc/samba/smbusers
to look like this
Code:
root = administrator admin
nobody = guest pcguest smbguest
sonos = sonos
This next is a new feature for Samba that some of the older howto's didn't need:
Code:
sudo smbpasswd -a sonos
and enter a password. This is the one you will use below during the Sonos set-up.

Restart samba to use the new config
Code:
sudo /etc/init.d/samba restart
Check it's working
Code:
sudo vi /var/log/samba/log.?mbd

Sunday, May 31, 2015

Deluge Web Tutorial for Ubuntu

Web UI

The Web UI is slightly different as the client is a web server daemon deluge-web that connects to a running deluged.
  1. Install deluge-web and run it:
    deluge-web
    
    Note: To run it in the background as a daemon, use --fork option. You may also want to set it up as aservice.
In your web browser, enter the url below where is the IP address of the server:
http://:8112
  • Default password is: deluge
Congratulations! You can now access deluge on the server via the Web UI.

Ubuntu Hibernation Tricks

Test if hibernate works 


Before getting started, press Ctrl+ALt+T on your keyboard to open the terminal. When it opens, run:
sudo pm-hibernate
Enable Hibernate in System Tray Menu:
The indicator-session was updated to use logind instead of upower. Hibernate is disabled by default in both upower and logind.
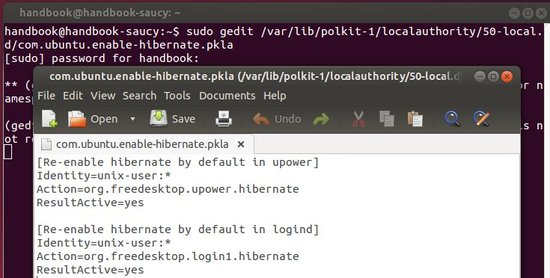
To re-enable hibernate, run the commands below one by one to edit the config file:
sudo -i

cd /var/lib/polkit-1/localauthority/50-local.d/

gedit com.ubuntu.enable-hibernate.pkla
Tips: if the config file does not work for you, try another one by changing /var/lib to /etc in the code.
Copy and paste below lines into the file and save it.
[Re-enable hibernate by default in upower] Identity=unix-user:* Action=org.freedesktop.upower.hibernate ResultActive=yes
[Re-enable hibernate by default in logind] Identity=unix-user:* Action=org.freedesktop.login1.hibernate ResultActive=yes
enable hibernate ubuntu 14.04
Restart your computer and done.
To Modify Options for Power Button
gsettings set org.gnome.settings-daemon.plugins.power button-power 'hibernate'
If you want to see your settings first, try this:
gsettings list-recursively org.gnome.settings-daemon.plugins.power